Friday, September 30, 2011

Love Coffee? I love you. (Giveaway!)


If you love coffee like I do, then I boy do I have good news for you.

This week at work we had the pleasure of getting a product preview from the amazing team over at Hamilton Beach. In addition to showcasing their wide range of affordable kitchen appliances, they also sent us home with a little swag. And somehow, I managed to take home not one but two different coffee makers.

Now what's a girl who just got a new coffee pot for her wedding supposed to do with these coffee makers? Give them away, of course!

So here's the deal: to one lucky reader I will be giving away a Hamilton Beach 'The Scoop' Single-Serve Coffee Maker. Unlike typical single-serve coffee makers, this machine lets you use your own coffee grounds to brew your single serve cup instead of requiring you to purchase a bunch of expensive pods, which is pretty amazing in my book. (and no, they didn't pay me to say any of this)

To enter: leave a comment below telling me why you need more coffee in your life! Comments will be open from now until Sunday, October 2, at 8 pm. I will announce the winner Monday morning!

Happy Friday!

Madison

iPhone Photos as of Late

{Taste panel at work included this amazing Strawberry Sangria.}
{A bow-patterened skirt from Banana Republic Outlet makes each week brighter.}
{Putting some of my new wedding photos to use as the background of my computer at work.}
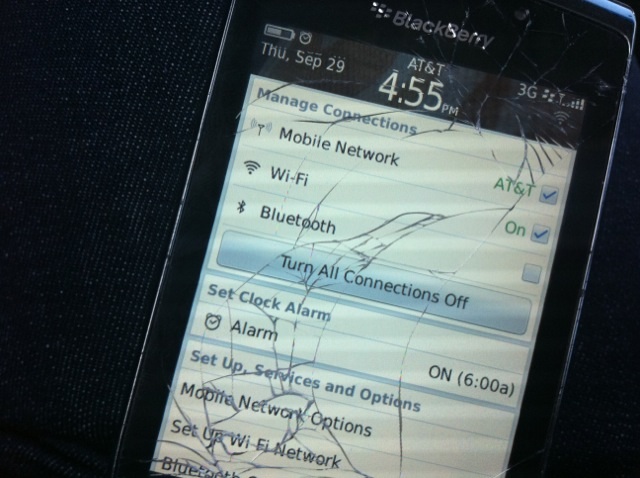
{Dropping my Blackberry was not the highlight of my week, to say the least.}

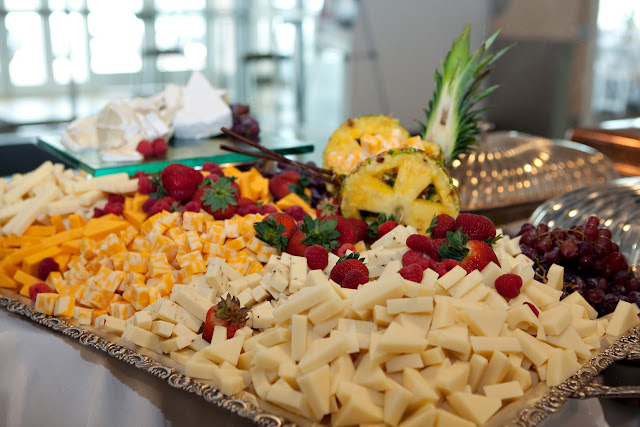
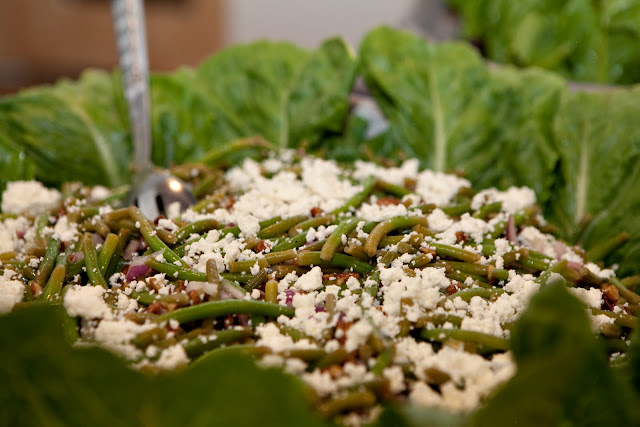
This weekend we are planning on celebrating my birthday a few days early. Since it's on a Tuesday, it's just more fun to celebrate on a weekend when you can do whatever you please. For me, that means watching college football on TV with a bunch of yummy tailgate-esque treats. 

Some of my favorite tailgate eats from around the web:


What are your favorite game-day treats?

Madison

Wednesday, September 28, 2011

Gluten-Free Chicken Parmesean


Typically, I don't set out with the intention of creating gluten-free recipes since I don't follow a gluten-free diet and neither do any of my family members. But as a food editor, I've seen a growing desire from our readers for more gluten-free recipes. Since I'm by no means an expert on the subject of gluten-free eating, it's a bit intimidating to attempt creating recipes that meet the parameters of avoiding all gluten.

In the future, I hope to be able to serve up more gluten-free recipes, since I know a number of Espresso and Cream readers are looking for more recipes of the sort. So when my cousin sent me a few bags of quinoa flour, which is gluten-free, I decided to get to work on playing around with recipes that could be easily adapted from their gluten-packed counterparts.

Chicken Parmesan to the rescue! Although you won't find me eating any chicken these days, Joey absolutely loved this dish. I served it with some veggies and pasta and it was a total hit: easy to prepare for me and super tasty and filling for him. That's a win-win in my book.


Also, if anyone has any good gluten-free text resources (ie: books, informative cookbooks, etc.) about gluten-free recipes and what ingredients contain gluten, please throw them my way. I'm looking for some good resources to add to my collection!

Gluten-Free Chicken Parmesan
Ingredients
*1 tablespoon canola oil 
*1 chicken breast, halved lengthwise into two thinner pieces
*2 heaping tablespoons quinoa flour (you may use all-purpose if you want but it won't be gluten-free)
*1/4 cup grated Parmesan cheese
*Salt and black pepper
*1/3 cup liquid egg replacement such as Egg Beaters
*2/3 cup pasta sauce (for a list of pasta sauces and other products that are gluten-free and commercially available, I found this site helpful.)
*Additional Parmesan cheese
*1/2 teaspoon dried Italian seasoning

Instructions
*Preheat oven to 350°F. Line a baking pan (I used an 9-inch round cake pan) with aluminum foil. Set aside.
*Heat the oil over medium-high heat in a nonstick skillet.
*Meanwhile in a shallow dish combine the quinoa flour, Parmesan cheese, and a dash of salt and black pepper. Pour the liquid egg replacement in a second shallow bowl. Dip the chicken breast halves into the egg mixture to coat on both sides. Transfer to the flour/Parmesan mixture and cover on both sides.
*Add chicken pieces to the skillet. Cook for 2 minutes per side. Just enough to brown the chicken but not cook it completely through.
*Transfer chicken to the foil-lined baking pan. Top with the pasta sauce, spreading the sauce evenly atop the chicken. Cook for another 15 to 20 minutes, until pasta sauce is bubbly and chicken is cooked through. Remove from oven and top with additional Parmesan cheese and the dried Italian seasoning.

Happy Cooking!

Madison

Tuesday, September 27, 2011

My First Ever Vikings Game

{Preparing for kickoff at the Vikings game in Minneapolis!}
{Not our most photogenic day, but it will have to do!}
{Stunning fall weather!}
{Headed home. Bummed the Vikings lost (again!) but fans through thick and thin!}

When Joey and I first started dating, we made a little deal. Since he didn't have a college team to cheer for, he would adopt my team, the Florida Gators, and cheer with me on Saturdays. I, on the other hand, didn't have an NFL team I felt connected to, so I would cheer for his Minnesota Vikings on Sundays. Our arrangement has worked out really well and I'll admit that I love having a team to cheer for on Sundays. So for Joey's birthday, I got him tickets to see the Vikings play the Detroit Lions. Although the Vikings lost, we had a great time up in Minneapolis watching the game and staying with our friends, Emily and Brian.

Question of the day: What football team(s) do you cheer for? 

For as long as I can remember, I've been a die-hard Gators fan. Growing up in Florida with a dad who is an even bigger fan will do that to a girl, I suppose. :)

Madison

Sunday, September 25, 2011

Almond Milk Ice Cream


Hi, friends! Hope you had a wonderful weekend! Joey and I spent the weekend up in Minneapolis for a little belated birthday celebrating (more on that later), and just got home a little over an hour ago. The weekend was packed full and fun but I'm ready to head to bed and rest up for the week ahead. It's going to be a crazy one!

Although it might be a bit late in the season to be posting ice cream recipes, I couldn't resist sharing one more that's quite different from the others I've made. First, it's low in calories, fat and added sugar. Second, it's packed with calcium, protein and other good-for-you ingredients that you can feel guilt-free eating.

Being a huge fan of almond milk, I've been toying with the idea of making a high-protein frozen dessert for a while now. Toward the end of last week I finally got around to making my dreams a reality when the craving for ice cream hit.

Be forewarned, this ice cream isn't as smooth and creamy as traditional cream-based desserts. It has a slightly more sorbet-like consistency and is best eaten immediately after it comes out of the ice cream maker. I can only imagine that I've got a few more days yet this fall that will allow me to justify making this treat again.


Almond Milk Ice Cream
Adapted slightly from Bay Area Bites

Ingredients
*1 1/2 cups unsweetened almond milk
*1/2 teaspoon vanilla extract
*1 medium ripe banana
*2 heaping tablespoons low-sugar chocolate milk powder
*2 heaping tablespoons chocolate protein powder
*1/2 teaspoon stevia or other sweetener

Instructions
*Blend all the above ingredients together in a blender until smooth. Transfer mixture to the bowl of an electric ice cream maker and freeze for 20 minutes or until mixture reaches an ice cream-like consistency. Serve immediately.

Happy Cooking!

Madison

Friday, September 23, 2011

Candid Moments


I promise this will be the last post on wedding-related pictures. I hadn't planned on posting more pictures, for fear of inducing wedding-related fatigue, but when I got these candid pictures back from our talented friend and photographer, Andy Lyons, I couldn't resist sharing a few more. Thank you, Andy, for catching some amazing moments!

Thursday, September 22, 2011

Pumpkin Bars with Cream Cheese Frosting


We might as well christen this pumpkin week over in the Espresso and Cream kitchen. In addition to eating it non-stop in Healthy Pumpkin Butter form, I've also been baking with canned pumpkin.

Joey grew up with a mom who frequently had a pan of bars in some shape and form sitting around the house for hungry boys to eat. And every now and again, I like to recreate this in our home, too. Last month it was Banana Sheet Cake and this month's version is Pumpkin Bars with Cream Cheese Frosting.

Of course, anything with cream cheese frosting is a hit in my book, but these bars are especially tasty and moist thanks to the canned pumpkin. As the days went by, the bars actually started to taste better, similar to the banana bread phenomenon. I would say that if you're thinking of making them to bring somewhere, a day or two ahead of time would yield fantastic results.

Pumpkin Bars with Cream Cheese Frosting
Adapted slightly from Sweet Pea's Kitchen

Ingredients
Cake Batter
*4 eggs
*1 2/3 cups sugar
*1 cup vegetable oil
*1 (15-ounce) can pumpkin puree
*1 cup all-purpose flour
*1 cup whole wheat flour
*2 teaspoons baking powder
*2 teaspoons ground cinnamon
*1/4 teaspoon ground ginger
*1/4 teaspoon nutmeg
*1/2 teaspoon salt
*1 teaspoon baking soda

Frosting
*8 ounce cream cheese, softened
*1/2 cup butter, softened
*2 cups sifted powdered sugar
*1 teaspoon vanilla extract
*1/2 teaspoon ground cinnamon

Instructions
*Preheat oven to 350°F. Lightly grease a 9x13-inch baking pan. Set aside.
*In the bowl of an electric mixer, combine the eggs, sugar, oil and pumpkin puree. Beat on medium heat until light and fluffy, about 2 minutes.
*In a large bowl, combine the remaining ingredients for the cake batter. Add the dry ingredients to the wet ingredients. Beat until just combined. Transfer batter to the prepared pan. Bake for 30 to 35 minutes, or until a toothpick inserted into the center comes out clean. Transfer to a wire rack; cool completely.
*Meanwhile, with an electric mixer, beat together the cream cheese and butter until smooth. Add in the powdered sugar, vanilla extract and cinnamon. Beat until smooth. Spread atop the bars and cut into squares.

Happy Baking!

Madison

Wednesday, September 21, 2011

Green Cleaning: Stainless Steel

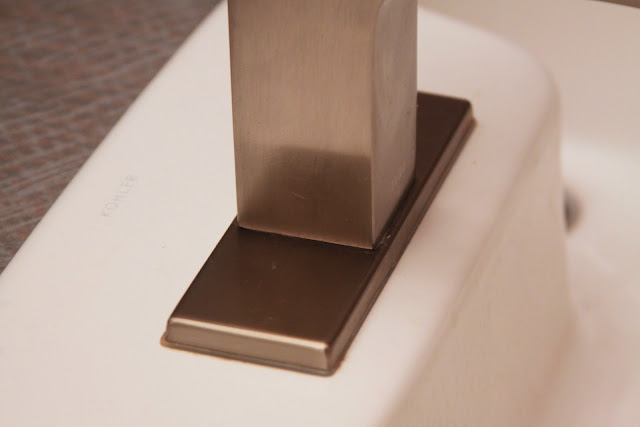
{Before}
{Before}
{Before}

As long as I can remember, I've lived in a house or apartment with stainless steel appliances and bathroom fixtures. And beautiful as they may be, they are a pain in the but to clean. Despite my best intentions and using stainless steel cleaner, I always struggled to get my steel to shine.

Last weekend my mom stayed with us on Saturday night. Being the mom that she is, she got to work cleaning our apartment and polishing our fixtures and appliances with her new, greener cleaning technique: olive oil.

Although I was skeptical at first, once I saw the results I was sold. Even Joey commented on how great our fridge looked, and that's not something he typically remarks on. The best part: it's super simple and doesn't require anything more than a paper towel or thin cloth and a bit of olive oil from your pantry.

What you need:
-Thin cleaning cloth or paper towel
-Olive oil

How it's done:
-Put a small amount of olive oil onto the cloth or paper towel. Use dampened cloth to buff the stainless steel. Re-dampen the cloth as needed.

{After}
{After}

Amazing, right? Don't ask me why I let my faucets get so bad in the first place, but rest assured my entire house looks much cleaner than it did a few days ago!

Happy Cleaning!

Madison

Sunday, September 18, 2011

Healthy Pumpkin Butter

Although it's only the middle of September, the pumpkin eating is in full-swing over here. Since last week when I first spotted it on the shelves of the grocery store, I've eaten five 15-ounce cans on my own. Some might call it excessive; I call it celebrating fall.

My favorite way to eat pumpkin is spread atop peanut butter toast. And although I would gladly eat it plain, I find most people prefer to have their pumpkin sweetened and spiced up a bit. Pumpkin butter over the commercial variety has always been a bit sweet for my liking and generally negates the healthy elements of pumpkin puree.

This Healthy Pumpkin Butter is the best of both worlds - slightly sweet and chock full of spice, it functions well as a spread, dip, stirred into oatmeal or when stirred together with vanilla yogurt and topped with granola.


Healthy Pumpkin Butter
Ingredients
*28-ounces pumpkin puree
*1 tablespoon ground cinnamon
*1/2 teaspoon ground ginger
*1/4 teaspoon nutmeg
*1 tablespoon honey
*1 tablespoon stevia or other natural sweetener

Instructions
*Combine all the above ingredients in a large saucepan over medium-high heat. Cook for 5 to 7 minutes, stirring constantly, until mixture is hot and cooked through. Be careful to stir frequently so as not to burn the pumpkin. Remove from heat and transfer to a sealed container. Refrigerate until ready to eat.

Happy Cooking!

Madison

Thursday, September 15, 2011

Whole Wheat Salt Bagels


As a child, one of my best memories was going to Brueger's Bagels with my mom. The nearest location was a couple hours away, so we would stock up on a couple dozen and store them in the freezer and eat away at them for weeks.

True to form, my favorite variety was always the salt bagels. Sure, they had way too much salt on the tops, but part of the fun was to pick off the salt until you got the perfect amount.

A few weeks ago I made my first batch of homemade bagels! I don't know why I hadn't thought of doing it before, since it's surprisingly easy. Although it takes a little time, the process is easy to understand and completely approachable.

Give it a try this weekend if you're in the need of a weekend project!

Whole Wheat Salt Bagels
Recipe Adapted from Southern Living

Ingredients
*1 3/4 cups hot (120°F) water
*1 packet active dry yeast
*2 tablespoons honey
*2 teaspoons salt
*2 cups all-purpose flour
*2 to 3 cups whole wheat flour
*Additional kosher salt

Instructions
*In a small bowl, combine the water and yeast. Allow to sit for five minutes.
*Pour water/yeast mixture into the bowl of an electric mixer; add the honey, salt and the 2 cups all-purpose flour and beat with the paddle attachment of an electric mixer until mixture is smooth.
*Change mixer attachment to a dough hook. Add in two cups of the whole wheat flour and stir for 6 to 8 minutes, or until dough is smooth and elastic. Add additional flour if necessary. Dough should be smooth, elastic, but not sticky.
*Shape dough into 10-inch long ropes about 1/2-inch in diameter (you should have 10 to 12 ropes total). Attach ends together to form a circle and pinch together to close.
*Place shaped dough rings on a parchment-lined baking sheet and cover with a towel. Allow dough to rise for 30 minutes to an hour. Refrigerate bagels for 4 to 6 hours.

*Preheat oven to 425°F. Line two baking sheets with parchment paper.
*Bring a large pot of water to boiling. Drop bagels, three at a time, into the boiling water for 1 minute, flipping halfway through. Transfer boiled bagels to parchment lined baking sheets. Sprinkle with kosher salt.
*Bake bagels for 15 to 18 minutes, or until tops are golden and bottoms are slightly browned. Cool slightly. Serve warm with butter!

Happy cooking!
Madison

Tuesday, September 13, 2011

Treadmill Incline Interval Workout 1

When my typical treadmill routines get a little dull, I frequently head on over to Iowa Girl Eats, Peanut Butter Fingers or Fitnessista for some butt-kicking inspiration. I'm telling you, these girls know how to put together a great workout that has you huffing and puffing without taking forever.

After following their routines for quite a while now, I thought it was high time I shared a workout or two of my own. On the days that I don't have to do one of my longer training runs, I like to mix up my cross training days with some speed work to rev up my metabolism and keep things interesting.

Next time you get a little bored, give this workout a try!

Madison

Sunday, September 11, 2011

Gluten-Free Mac and Cheese


The road warriors are back from Chicago! We traveled across the state of Iowa and over to Illinois for the weekend to stay with my sister-in-law (Joey's sister) Amber and her hubby Jake. They are expecting a baby in a little over four weeks so this will most likely be the last time we see them until the baby arrives. So darn exciting! The other purpose of our trip was to watch Jason, Joey's brother, play football. He's a senior in college so we are going to try and make it to as many games as possible this season.


Before we headed out for the weekend, I found myself with a bag of quinoa pasta on my hands (more on that later). Paired with a block of cheese, it seemed like the perfect excuse to make a slightly healthier version of macaroni and cheese. I'm a sucker for a good homemade version of the cheesy stuff and figured Cooking Light would be the best place to start looking for a recipe.

Of course, they did not disappoint. The original recipe wasn't gluten-free, but making a few small alterations quickly turned things around. I also added in some creamy Dijon mustard and paprika for a bit of tang and dimension and sharp white cheddar cheese for another punch of flavor.

After making the stovetop recipe, I spooned the mixture into four ramekins and covered the ramekins with aluminum foil. When we returned from our trip, dinner was ready to be heated up in the microwave and finished in the oven, just be sure not to top with cracker crumbs and broil until you are ready to eat.

Personally, I find the best way to eat this dish is when paired with a large side of steamed broccoli to balance out all the cheese. What's your favorite mac and cheese add-in?


Updated 9.13 to Note: Reader Jennifer sent me a very kind and insightful e-mail after I originally posted this recipe (which called for gluten-free whole wheat crackers) letting me know that such a thing doesn't exists since it is made with wheat, which contains gluten. She is completely right and I've made changes to the recipe to reflect this. 

Gluten-Free Mac and Cheese
Recipe adapted from Cooking Light  

Ingredients
*1 1/4 cups quinoa (or other gluten-free pasta) elbow macaroni pasta
*1 cup 1% milk
*2 tablespoons all-purpose flour
*1 teaspoon Dijon mustard
*1/4 teaspoon paprika 
*3/4 cup shredded sharp white cheddar cheese
*1/2 cup shredded gruyere cheese 
*1/2 teaspoon salt
*1/8 teaspoon black pepper
*Crushed gluten-free crackers (optional)

Instructions
*Cook pasta according to package instructions. Drain and set aside.
*Combine milk and flour in a medium saucepan, stirring with a whisk. Cook over medium heat for 2 minutes or until mixture is thickened, stirring constantly. Add in the mustard, paprika, shredded cheddar cheese, salt and black pepper. Stir until the cheese is melted and mixture is smooth. Remove from heat.
*Add pasta to the cheese mixture and stir gently until evenly coated. Spoon pasta mixture into four ramekins. Top with crushed crackers, if desired.
*Preheat broiler. Broil mac and cheese for 1 minute. Remove from heat and serve immediately.

Happy cooking!

Madison

Friday, September 9, 2011

The Wedding Reception


All of our wedding photos are courtesy of the amazingly talented Mindy Myers and her assistant, Mandy Miller. If you are looking for a photographer that is a joy to work with, energetic and professional (not just for weddings, but for a variety of other photography needs) please, please go check her out HERE

Have a happy weekend, everyone! 
Madison
Related Posts Plugin for WordPress, Blogger...